Dawn of Defense Capture Islands — RTS Siege Guide
Bridges, Barracks, high ground, and when to push fortresses without losing Spiridun.
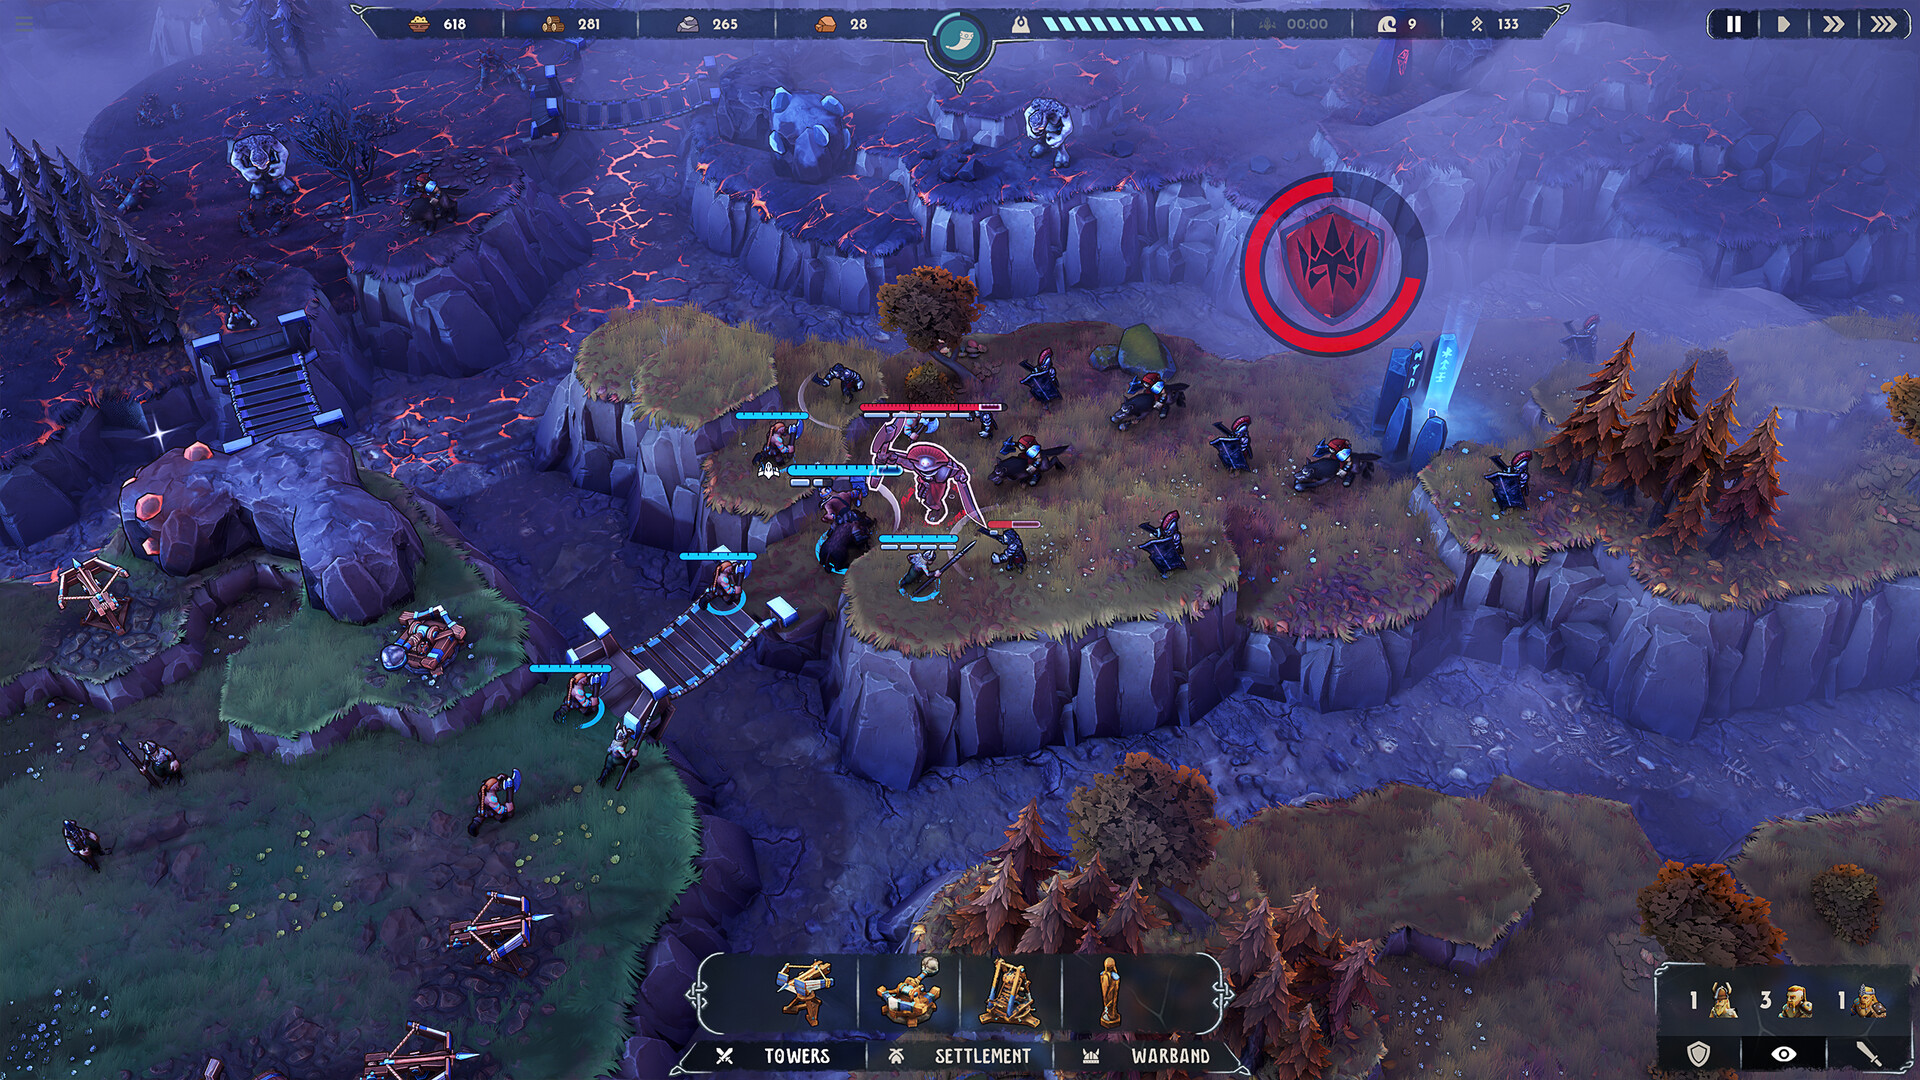
Holding trenches is only half of Dawn of Defense. To grow plots, deposits, and fortress access you must capture islands with warriors in RTS sieges while towers still cover Spiridun. This guide covers Bridges, Barracks timing, unit roles, high-ground value, push windows, and when to commit toward the three fortresses. Use it after Getting Started and alongside Economy & Resources so every captured tile immediately produces Wood, Food, Iron, or Stone.
The game is single-player Tower Defense + RTS + Roguelite on Steam PC (released November 17, 2026). No ally will cover your lane while you siege — plan the dual clock deliberately.
Why islands matter
Captured isles become footholds: new tower plots, resource adjacency, Barracks forward staging, and eventually paths into Empire fortresses. Procedural seeds change layouts, but the rule is constant: islands you do not take eventually feed the enemy’s pressure, while islands you take without defending Spiridun feed a quick game over.
Plot capacity is per island. A tiny rock with one weak forest tile may not be worth a Bridge during a brutal wave cycle. A wide island with fields, elevation, and a Stone deposit can redefine the run.
Bridges: the tempo building
Bridges let warriors cross trenches. They cost Wood and open both opportunity and risk — your units path out, and you must still watch the lane those trenches feed. Build a Bridge when:
- The next island is scouted and valuable.
- You have a warband ready or nearly ready.
- The current wave is clear or trivial for your towers.
Do not Bridge into a fight you cannot finish before the next spawn. A half-captured island with your army stranded is how Spiridun dies off-screen.
Barracks and warband composition
Barracks trains your RTS force. Early compositions that work on most seeds:
- Shieldbearer front line to absorb hits.
- Axemen for general damage.
- Spearmen for reach and flexible targeting.
- Shieldmaiden when you need another durable fighter in the mix.
- Catapults once Iron and Stone support siege damage against fortified holds.
Heroes chosen at the altar add unique abilities — pick kits that match the siege problem (gap close, buff, burst) rather than whatever looks flashy. Banner Carriers on the enemy side buff nearby foes; prioritize them in island fights the same way you will in fortress wars covered by Beat Warlords.
Train in pulses. Queue a squad, capture, reinforce, return attention to towers. Continuous Barracks spending while trenches escalate is a classic loss pattern.
High ground and tower staging
Elevation buffs tower range and related stats. After a capture, decide the island’s job:
- Economy island — maximize deposit buildings and Meadhall; light or no towers.
- Gun island — plant Boltskot, Skullbrakkr, Tarbarl, Eyodin, or Krokran on elevation covering a trench fork or approach.
- Hybrid bridgehead — one high-ground tower plus the best producer tile.
Krokran shines against unarmored island defenders. Eyodin marks make subsequent tower and unit damage hit harder on elites. Tarbarl slows fleeing or reinforcing packs. Skullbrakkr punishes clumps on chokepoints. Boltskot remains the reliable single-target spine.
Combat layers: Health, Armor, Ward
Island fights teach the same defenses you will see on warlords. Health is raw HP. Armor reduces physical punishment — bring focus fire, vulnerability marks, or the right unit mix. Ward appears on threats like Phalangors and needs respect; do not assume every damage type melts Ward equally. Scout the defenders for one second before committing Catapults or fragile Axemen into a bad matchup.
Push windows and the dual clock
A clean push window looks like this:
- Trench wave cleared; towers idle or finishing stragglers.
- Spiridun healthy.
- Bridge up; warband rallied.
- Target island identified with a post-capture building plan.
- You will finish the fight or safely retreat before the next wave banner.
If any step fails, delay. Farming a safe island chain for Meadhall clusters often beats a heroic early fortress attempt. When you do push fortresses, you need the economy depth from Economy & Resources and the boss prep from Beat Warlords.
When to push fortresses
Full campaign structure features three fortresses with unique bosses. Push a fortress when:
- Your meta Runes and current Runestones unlocked the tools the boss demands.
- Iron and Stone income supports Catapults and upgrades.
- Multiple islands already produce under Meadhall.
- You can leave a trench tower net that survives without constant micro.
- You understand the warlord’s Armor, Ward, and Banner Carrier pattern.
Do not push because the fortress is “visible.” Push because the dual front is stable. Blood Moon difficulty increases Rune rewards and punishment — clear fortress routes on lower pressure first if you are still learning siege timing.
Army micro tips without losing the lane
- Group move to high ground before engaging downhill charges.
- Focus Banner Carriers immediately.
- Pull Shieldbearers forward; keep Catapults back.
- Retreat across the Bridge if a surprise trench wave spawns — living army plus living Spiridun beats a pyrrhic island.
- After capture, place the planned building before wandering to the next fight.
Autosave is experimental at launch. Pause before irreversible fortress commitments if you can, and avoid mid-fight menu diving while Spiridun is under fire.
Runestone picks for map control
Favor Runestones that unlock units, Bridges value, plot caps on new islands, or army buffs when your seed is expansion-heavy. Favor tower Runestones when every island take is interrupted by trench emergencies. Remember: Runestones are per-run; Runes after the attempt fund permanent skill-tree power for future sieges.
Related guides
- Getting Started — when to raise the first Barracks and Bridge.
- Economy & Resources — what to build the moment an island falls.
- Beat Warlords — fortress bosses and Blood Moon prep.
- Guides Hub — full guide index.
Island control is tempo. Bridge with purpose, compose for the defenders you see, seize high ground for towers, and never forget the trench timer ticking behind you.
Frequently Asked Questions
Quick answers about Dawn of Defense and this wiki.
When should I build a Bridge?
Build a Bridge when the target island is valuable, your warband is ready, and the current trench wave will not punish Spiridun while you siege.
What units should I train first for island captures?
Start with Shieldbearers in front and Axemen or Spearmen behind. Add Shieldmaidens as needed and Catapults once Iron and Stone allow.
Why is high ground important on captured islands?
Elevation buffs tower stats and range. Use high tiles for lane-covering towers; keep deposit-heavy tiles for Sawmills, Windmills, Quarries, and Mines.
When do I push a fortress instead of farming islands?
Push when economy is stable under Meadhall, trench towers can idle safely, and you have the Armor, Ward, and siege tools the warlord requires.
What are Banner Carriers?
Enemy support units that buff nearby foes. Kill them first in island fights and fortress sieges to collapse enemy durability.