Getting Started in Dawn of Defense
First-hour survival: tutorial, early build order, and the tower-versus-army attention split.
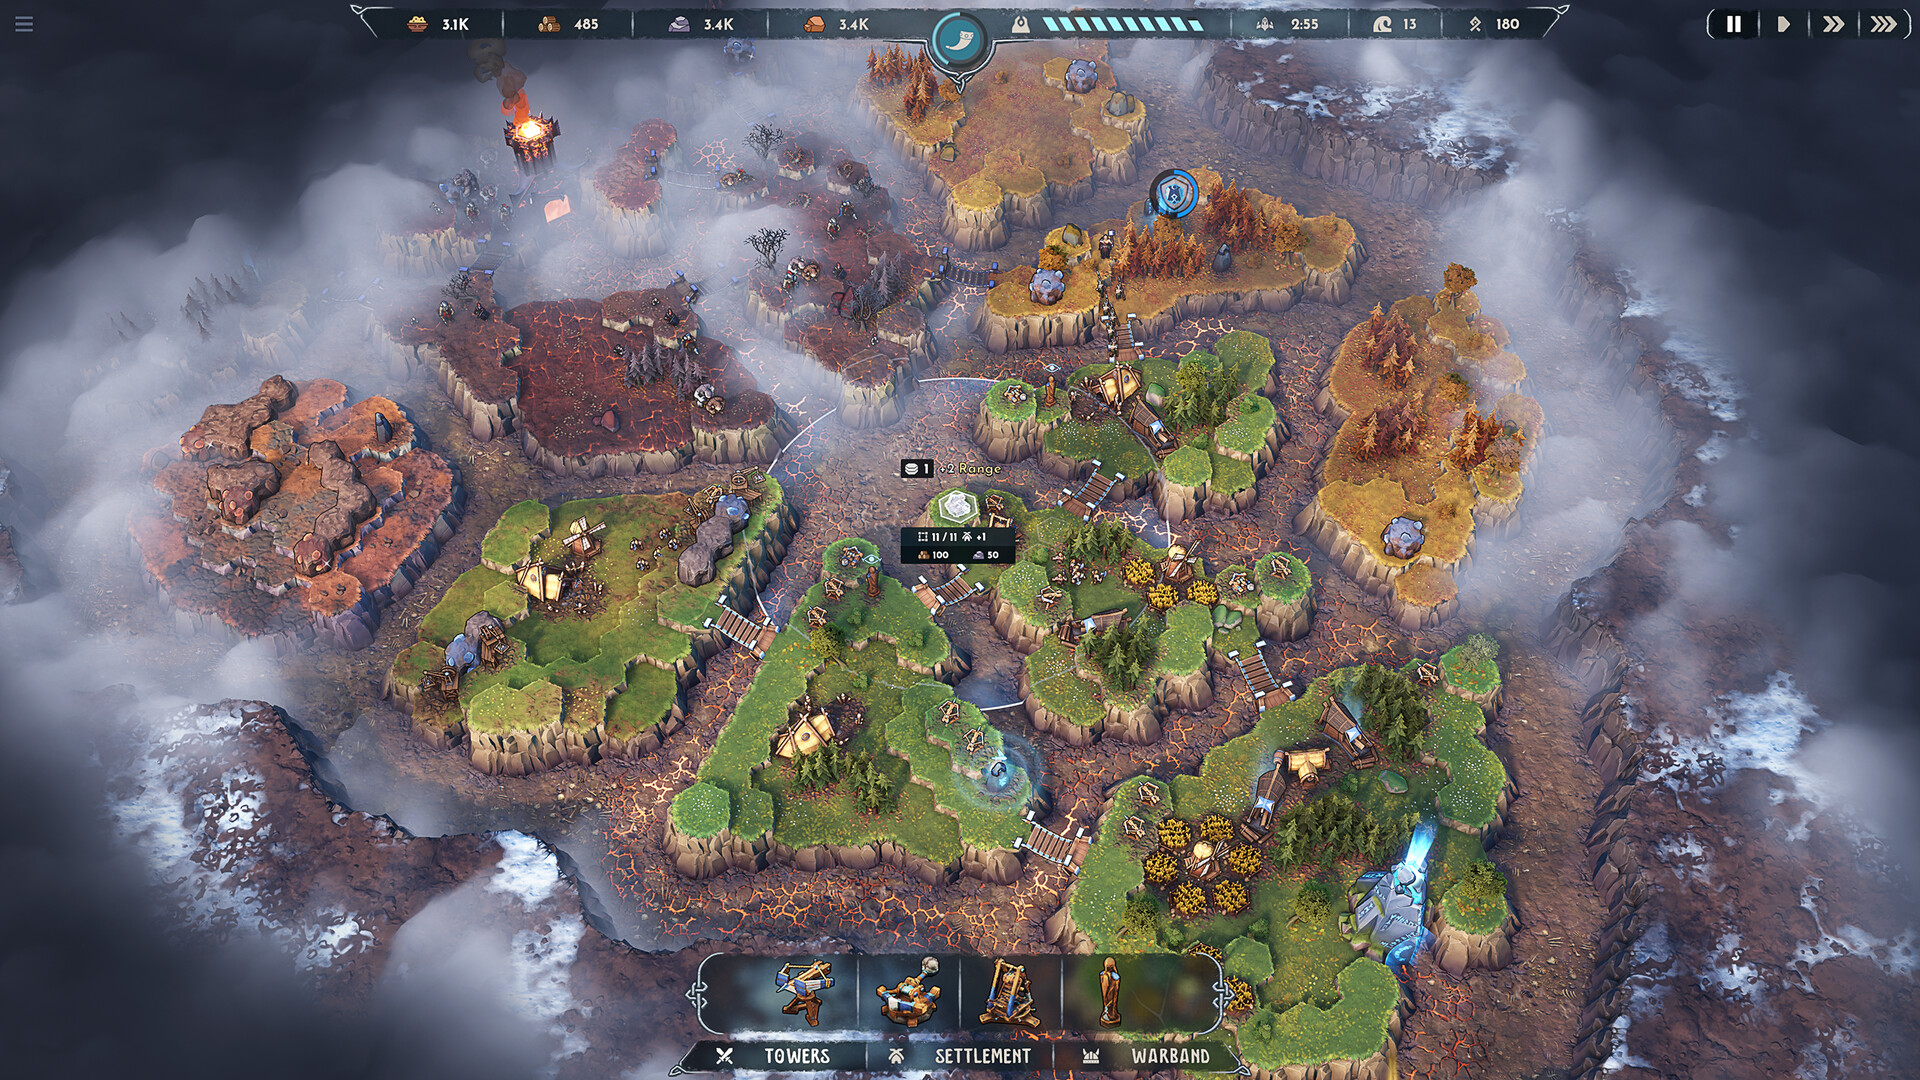
Dawn of Defense throws two games at you at once. You must hold trench lanes with towers while training warriors to capture islands in RTS sieges — all while the sacred Spiridun nexus is the fail condition for the entire run. This Getting Started guide covers the first hour after the November 17, 2026 Steam launch: tutorial priorities, early economy, a safe build order, and how to split attention without losing Spiridun. The game is single-player only; there is no multiplayer safety net.
If you want the wider map of topics after this page, return to the Guides Hub. For production math and Meadhall placement, continue into Economy & Resources.
Finish the tutorial with intent
Treat the tutorial as a systems checklist, not a skippable cinematic. Confirm you can:
- Select and place towers along trench approaches.
- Queue settlement buildings on available plots.
- Train a small warband and issue move or attack orders across a Bridge.
- Recognize the Spiridun panel — if it falls, the run ends.
- Understand that after a cleared wave you will pick one of three Runestones.
Do not leave the tutorial until trench targeting and unit move orders feel natural. Mis-clicks during the first real wave are how beginners lose Spiridun while staring at an empty island.
The attention split: towers versus army
The defining skill in Dawn of Defense is not raw micro — it is knowing which front is currently lethal. Early waves are usually answered with towers. Boltskot (ballista, single-target) is your reliable opener for armored or high-HP marchers. Skullbrakkr (catapult AoE) pays off when packs clump in trenches. Tarbarl applies tar slows so fewer enemies reach Spiridun. Eyodin marks enemies vulnerable for follow-up damage. Krokran harpoons stun and shred unarmored packs.
Your army — Axemen, Spearmen, Shieldbearers, Shieldmaidens, and later Catapults — exists to take islands and eventually assault fortresses. In the first hour, train only enough warriors to seize one safe expansion. Over-investing in Barracks before Wood and Food income is stable starves tower coverage. Under-investing forever means you never unlock deposits behind enemy islands.
A practical rule: if a trench wave is already walking, pause island micro and retarget towers. If the trench is clear and a Bridge is built, spend thirty seconds pushing the nearest undefended island, then snap back home.
Protect Spiridun first
Spiridun is the divine nexus and your HQ. Tower range, elevation buffs, and chokepoint placement all exist to keep damage off that structure. Place the first Boltskot where trench pathing funnels enemies into a long engagement, not where the tower looks “pretty” on high ground with no lane coverage. Elevation can buff tower stats, but a high tile that does not see the lane is wasted plot space.
Keep a mental HP check on Spiridun every wave. If it takes chip damage early, add Tarbarl slow or a second Boltskot before you spend Wood on vanity buildings. Regeneration effects from certain Runestones or upgrades can help, but they are insurance — not a substitute for kill power on the lane.
Early economy bootstrap
Resources are Wood, Food, Iron, and Stone. Early runs live and die on Wood and Food:
- Sawmill near forest tiles for Wood.
- Windmill near fields for Food.
- Quarry beside Stone deposits when unlocked.
- Mine on Iron veins when unlocked.
- Meadhall later to boost nearby resource buildings by 50%.
In the first hour, prioritize one Sawmill and one Windmill on strong deposit adjacency before Barracks spam. Islands have plot limits, so every building competes for space with towers. Read Economy & Resources for Meadhall radius thinking and expand-versus-defend timing once you leave the tutorial island comfort zone.
Safe early build order
Adapt to the procedural map, but use this as a default spine:
- Tutorial complete — confirm hotkeys and Spiridun awareness.
- First Boltskot on the primary trench funnel.
- Sawmill on the best forest adjacency you can reach without a Bridge.
- Windmill on the best field adjacency.
- Second tower — Tarbarl if packs feel fast, Skullbrakkr if they clump, another Boltskot if elites are tanky.
- Barracks only after Wood income covers both tower repairs or replacements and unit training.
- Bridge toward the nearest low-threat island with deposits or plots.
- Small warband (Shieldbearer front, Axemen or Spearmen behind) to capture that island.
- Forward Sawmill or Windmill on the new island, then snap towers back to trench duty.
- First Runestone pick after the wave — favor economy or tower unlocks until you understand the map seed.
Heroes are chosen at the altar with unique abilities. In the first hour, pick a hero whose kit helps the weaker front of your seed — lane clear if trenches are nasty, raid speed if islands are soft.
Mid-run checkpoints for hour one
By the end of a successful first hour you should have:
- Spiridun never critically low.
- At least two productive resource buildings with clean deposit adjacency.
- A trench tower mix that handles the current wave composition.
- One captured expansion island with either economy or a forward tower plot.
- A Runestone plan that matches your seed (economy if poor deposits, damage if trenches are brutal).
If you are stuck on islands, study Capture Islands. If warlords are ending your runs, jump to Beat Warlords before climbing difficulty toward Blood Moon.
Runestones versus Runes (do not mix them up)
After waves you choose one of three Runestones. Those powers last for the current run only and can unlock towers, buff units, or accelerate economy. After the run ends — victory or defeat — you bank Runes into the permanent skill tree. Early meta spends that unlock extra Runestone options, plots, or economy nodes usually teach the game faster than pure damage nodes.
Common first-hour mistakes
- Ignoring Spiridun while admiring an island fight.
- Building Barracks before Sawmill and Windmill adjacency is good.
- Placing every tower on elevation that cannot see the trench.
- Spending all Wood on army when the next wave needs Tarbarl or Eyodin.
- Treating Runes and Runestones as the same currency.
- Pushing a fortress in hour one instead of stabilizing economy — save fortress theory for later guides.
What to do next
Stabilize a few runs with this build order, then deepen production with Economy & Resources. When Bridges and Barracks feel natural, practice aggressive takes in Capture Islands. Only then climb fortress content with Beat Warlords. Return to the Guides Hub whenever you need the full index.
Dawn of Defense rewards calm dual-front thinking more than panic clicks. Keep Spiridun alive, feed Wood and Food, and let islands fall on your schedule — not the Empire’s.
Frequently Asked Questions
Quick answers about Dawn of Defense and this wiki.
What should I build first in Dawn of Defense?
Place an early Boltskot on the main trench funnel, then a Sawmill and Windmill on strong deposit tiles before heavy Barracks investment.
How do I keep Spiridun from dying early?
Watch the lane every wave, add Tarbarl slows or extra Boltskot damage when Spiridun takes chip damage, and never ignore trenches during island micro.
When should I train my first army?
After Wood and Food income can support both towers and training. Capture one safe island, then return attention to the trench.
Are Runestones permanent unlocks?
No. Runestones are temporary per-run picks after waves. Runes earned after each run fund the permanent skill tree.
Is there multiplayer for learning with friends?
No. Dawn of Defense is single-player only on Steam PC with no multiplayer mode.